 After
noticing that the driver's side wheel was bouncing around a lot, I
realized that the shock absorber was not working. I checked the fluid
level and found it very low. I filled it with Motorcycle Fork Oil.
After about another month, the same problem was occuring. So I ordered
two rebuilt shock absorbers from Apple Hydraulics. I was fairly
successful in doing the replacement. Here is the saga....
After
noticing that the driver's side wheel was bouncing around a lot, I
realized that the shock absorber was not working. I checked the fluid
level and found it very low. I filled it with Motorcycle Fork Oil.
After about another month, the same problem was occuring. So I ordered
two rebuilt shock absorbers from Apple Hydraulics. I was fairly
successful in doing the replacement. Here is the saga....[SDMGC] Front Shocks 66B Hints?
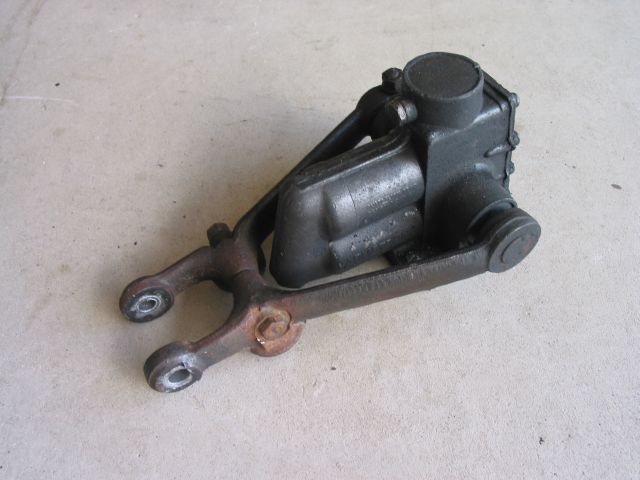
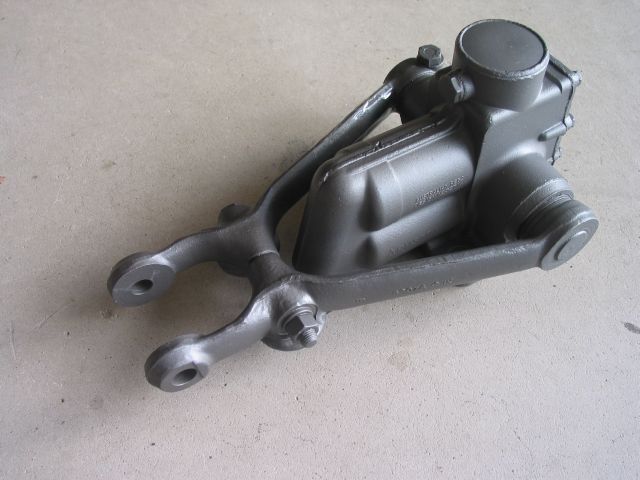
I just received two rebuilt front shocks for my 66B from newsletter advertiser, Apple Hydraulics (old ones are leaking). I also received replacement bushings. From Moss, I ordered two rebound buffers, 8 mounting bolts and cotter pins.
Before I attempt to replace the shocks, I wanted to ask here for any advice or hints on doing this.
Re: [SDMGC] Front Shocks 66B Hints?
Mark,
It isn't that hard to replace MGB front shocks (or even springs).
The springs don't hold a lot of tension like on some other cars so it
isn't dangerous.
I'd jack the car up and put axle stands under the spring / on the
lower wishbone pans. This will use the weight of the vehicle to
keep the springs compressed, assuming all you're planning to do is
change the shocks. I like to have at least the two axle stands and
maybe the floor jack already in position and taking a little of the
weight as insurance.
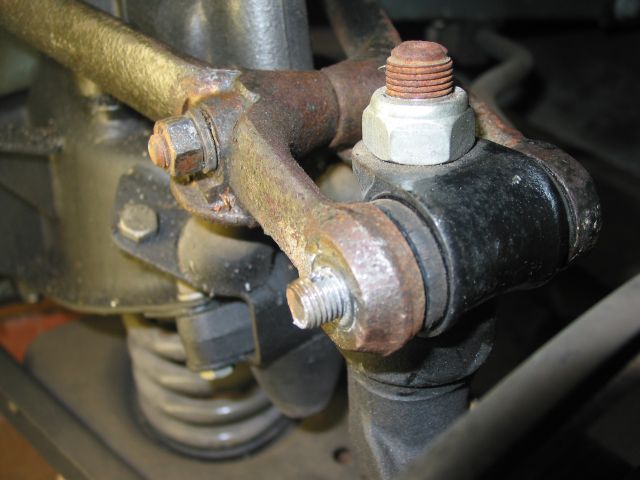
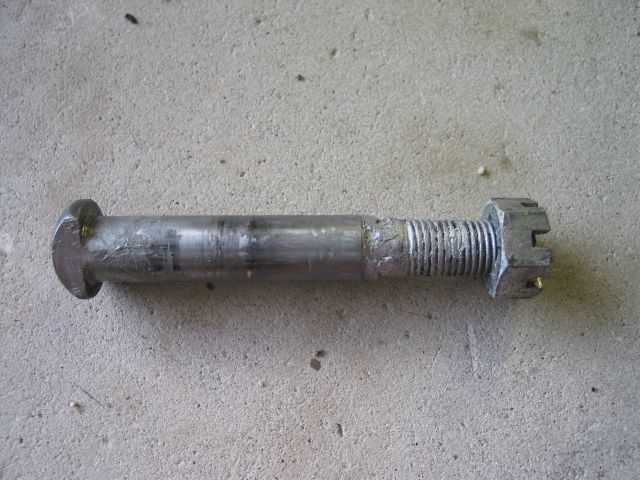
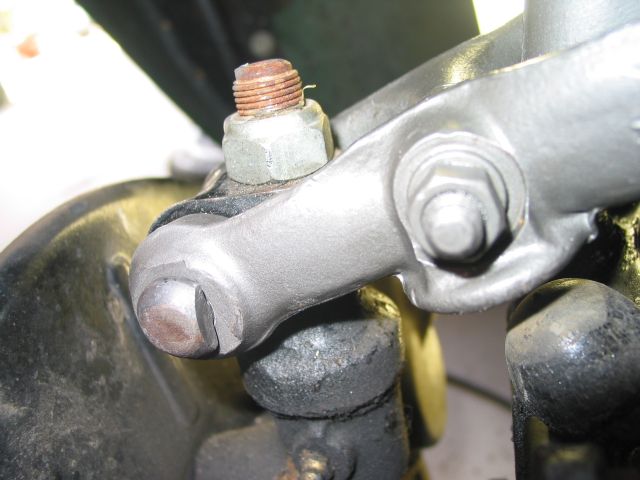
Then remove the cotter pin/castle nut from the shock / upper
mounting pin. To get the shock off, you probably just need to drift the
old (keyed) fulcrum pin (moss #263-440) out of the joint and use a
lever to pry the arm off of the joint. Then you can remove the 4 bolts
that mount the shock to the crossmember.
With the shock off, you can carefully support the disk brake /
axle, etc. so it doesn't mess up the brake flex hose. You can now
replace the bump stops.
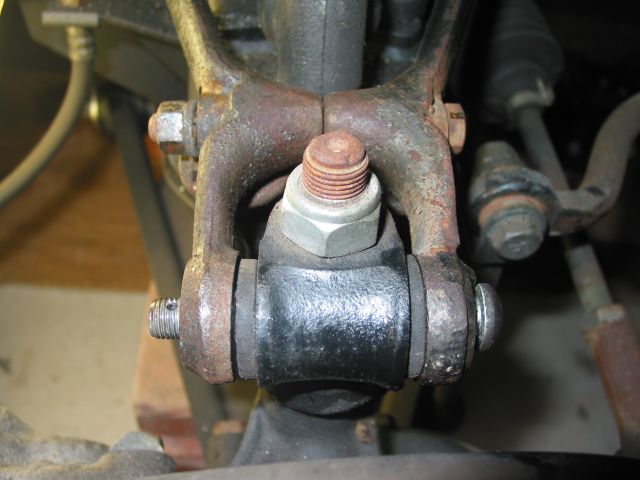
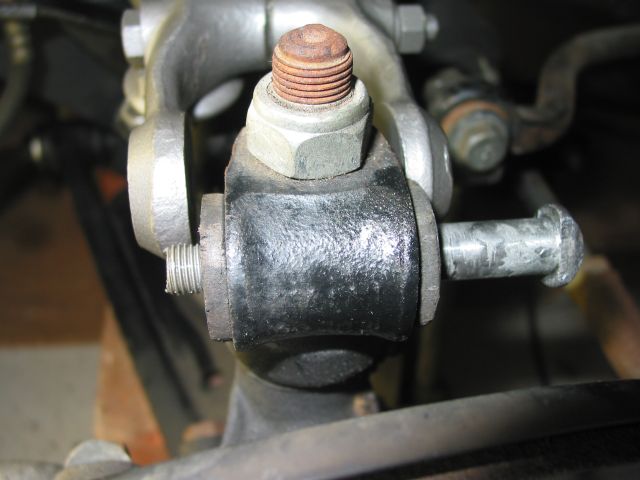
Are you replacing the rubber bushings (moss PN #282-305) that go
into the upper trunnion (the metal part that is bolted to the kingpin
vertically and to the shock horizontally)? I think you should, they
often split.
With new rubber bushings, you might think it is impossible to fit
the shock to the trunnion. There is a bolt that holds the two lever
arms together (about 1/2 down the arm). Remove that. Then one of the
arms is held onto the shock pivot by a bolt. Remove that (don't just
loosen it), and you can use a rubber mallet to remove the shock arm
from the shock. You'll see that there is a keyway for the bolt at the
pivot.
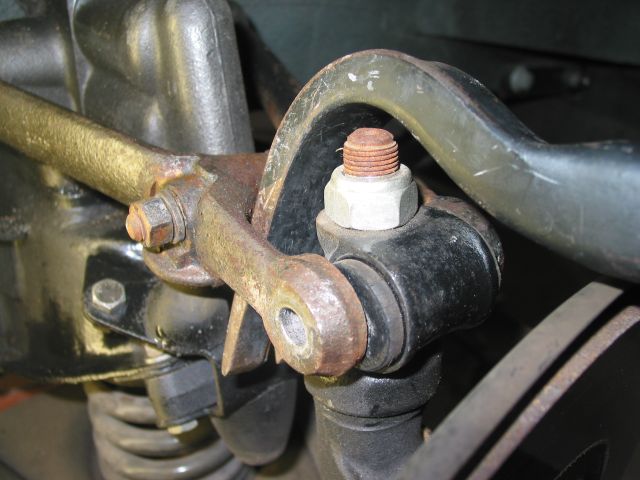
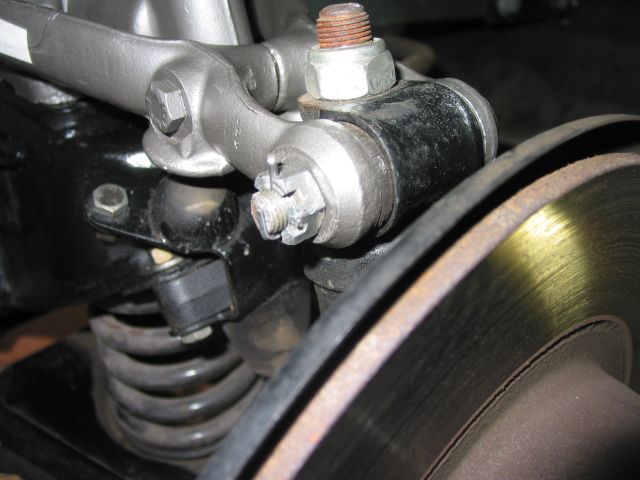
Now here is a point people may agree or disagree with. I loosely
bolt the shock to the cross member and get all 4 bolts finger tight.
There is some slop in the holes and the shock can turn a couple of
degrees. So I get it on, but loose, and then attach it to the upper
trunnion. Others may think you bolt the shock down tight first (before
installing to the trunnion) or last (after installing to the trunnion).
The manual says "installation is the reverse of removal" which measn to
tighten the shock down first. You may want to grease (copper grease
preferred) the bolts first to help keep rust away. The engine leaks
don't really protect these bolts that well!
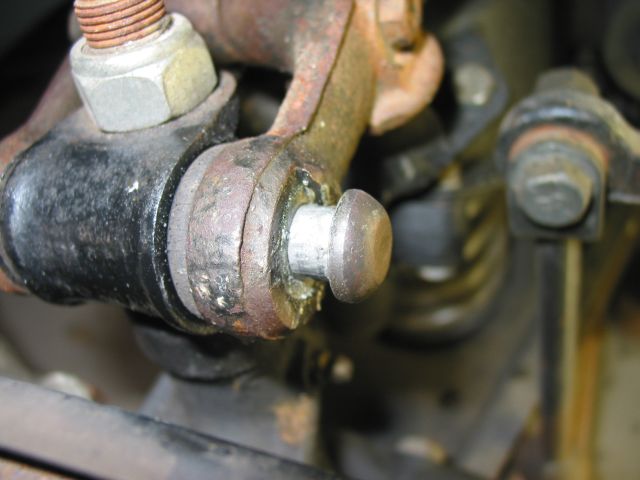
Put the new bushings in and bolt the arms around the bushing. You
have to install the bolt that joins the two arms, tapping the removable
arm back on to the pivot. When you get that bolt tight, you should be
able to re-install the shock arm bolt back onto the pivot. You should
probably play with one of your old shocks before you fool with the new
ones. A little grease on the pivot will help.
When the shock is back on the trunnion, you torque the 4 mounting bolts down.
Andy

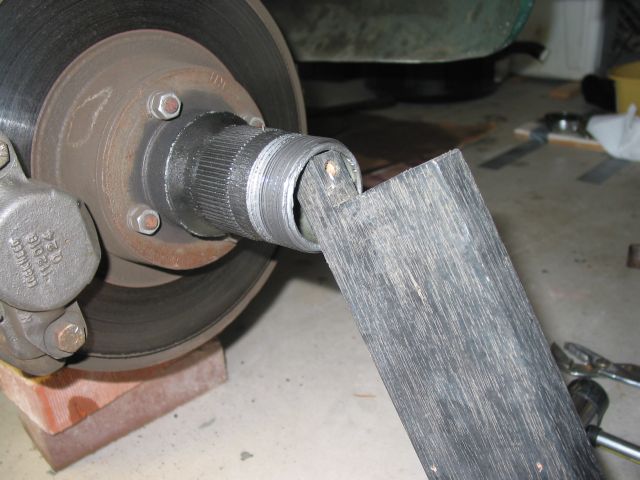
On the driver's side, it took me 3 days to replace the shock. Not because it was hard but because I had to learn the techniques of using a rubber/plastic headed mallet to get the parts apart. I didn't take any photos then of this side. The remaining photos are then of the passenger side which was not leaking.


Re: [SDMGC] Front Shocks 66B Hints?
Thanks for the hints about replacing my shocks on my 66B. Replacing the first one took 3 days, the second took 1 hour......
My problem, as usual, was lack of experience. Replacing the first shock was the learning experience. Understanding how hard to bang on the fulcrum pin to remove it and how hard to bang on the shock arm to get it over the bushings was key. A plastic/rubber headed hammer was important here. I did not remove the arm/shock pivot bolt as Andy suggested. Apple Hydraulics had attached a big warning note to the shock arm to NOT remove the bolt. As it turned out, I was able to get the arm over the bushings without the need to remove the arm/bolt.
A question - Since the shock itself is the upper control arm of the front suspension and it certainly seemed like the new shock arm changed the geometry of the front end, is it necessary to get a front end alignment now?
Re: [SDMGC] Re: Front Shocks 66B Hints?
Mark,
When the suspension is rebuilt to stock specifications and in
place, the only alignment adjustment is the toe-in, which should be
about 1/16". Of course you can always use negative camber A-arms and
offset bushings, but that's more for autocross and racing.
The stock suspension is really quite good for a street car of this era.
Cheers, Paul